Quick Service to copy code format and reserve syntax highlight

- Overview
- Prerequisite
- About Pygments
- Automate with Services
- Command Line variant
- Explore highlight style
- Troubleshooting (Extra)
- Disclaimer
Overview
This short tutorial aims to simplify the process of reserve the syntax highlight property of any code blocks and paste them into other application such as Microsoft Word, Keynote, etc. conveniently with System Service routines and couple of clicks.
Update: [2019-06-12] Visit this repo to get the available Service workflow or type
1
svn checkout https://github.com/tinng81/CopyHighlightService.git
in your Terminal app to directly download it.
Prerequisite
1. Install Python-powered Syntax Highlighter Pygments via Terminal app
1
2
3
4
5
# Python 2.7
pip install pygments

# Python 3.x
pip3 install pygments
pip/ pip3: Python Package Managers
Side note: Python 2.7 end of life is on January , 2020 and Python 3.x is backward-incompatible, i.e. you cannot keep using obsolete modules. It is highly recommended to install Python 3.x instead.
2. (Optional) In case you don’t have Python installed yet. Download Python 3 Latest Release here. Or follow the below script to install via command line.
1
2
3
4
5
6
7
8
9
10
11
12
13
14
15
16
17
18
19
20
#! /bin/bash

# One-liner install homebrew using default Ruby shipped with your macOS Version
mkdir homebrew && curl -L https://github.com/Homebrew/brew/tarball/master | tar xz --strip 1 -C homebrew

# Then update the default PATH to use homebrew with your Shell
# Or other config file, E.g. '.bashrc'
test -f ~/.zshrc && echo "export PATH="/usr/local/bin:/usr/local/sbin:$PATH"" >> ~/.zshrc && source ~/.zshrc

# Verify successful installation
brew --version

# Install Python via Brew
brew install python

# Or specify a version
brew install python@2

# Lastly, install the Syntax Highlighter as in step 1
pip3 install pygments
Side note: Have a look into similar tutorials for Python installation and settings.
About Pygments
Python is an intepreted, high-level and without a doubt, the most common general-purpose programming language as of 2018.
And Pygments is simply a syntax highlighter suitable for code hosting, forums, wikis or other applications that need to prettify source code.
From the Terminal, use command pygmentize to initiate and provide input flags to process your code block. If you have experience with Python, head to the next section on how to use Pygment in Python Environment.
1
2
3
4
5
touch test.py && echo 'print("Success") # Just a comment' > test.py

pygmentize -f html -O style=friendly,full=True -o result.html test.py

open result.html
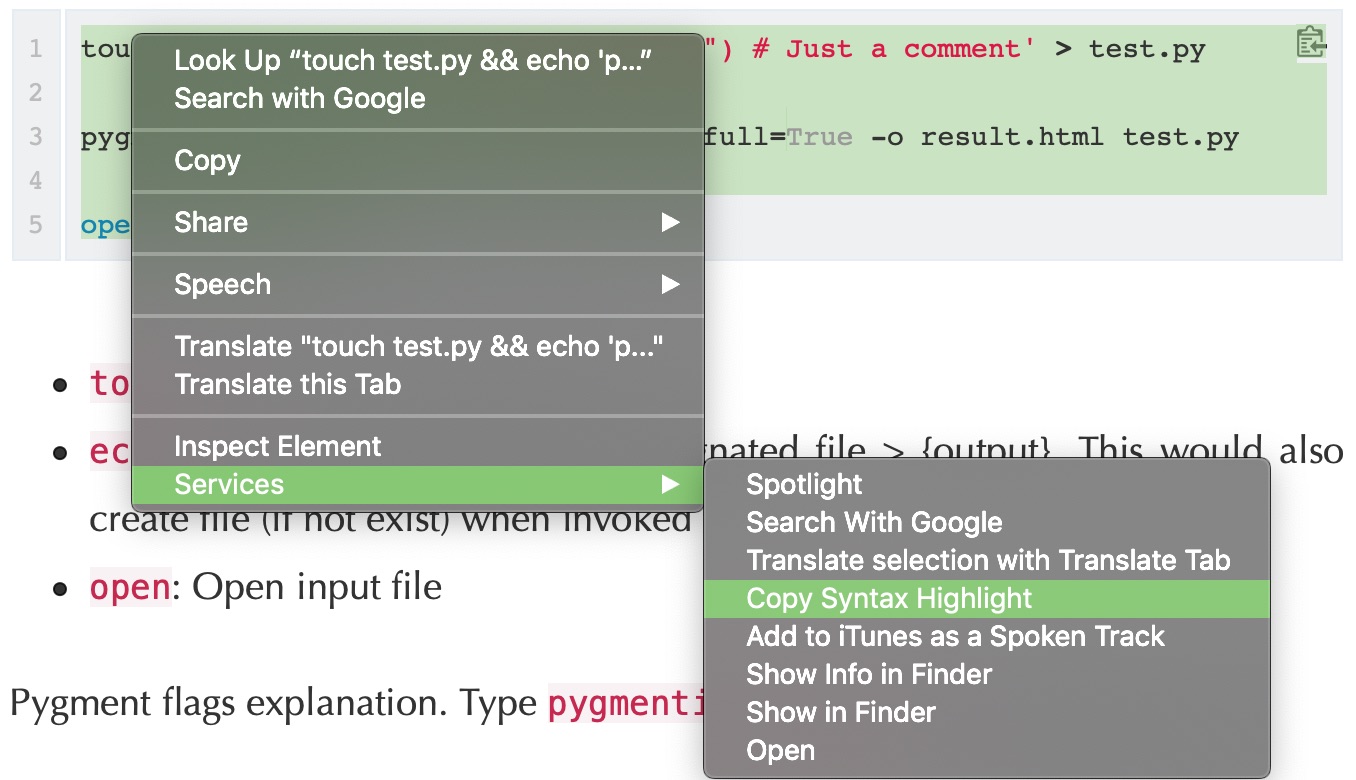
touch: Create a file named test.pyecho: Insert ‘{string}’ of text to designated file > {output}. This would also create file (if not exist) when invokedopen: Open input file
Pygment flags explanation. Type pygmentize --help for a detailed manual.
-f: Format flag-O: Option flags, comma separated values-o: Output file (stdout)
Lastly, the test.py file was given as input (stdin) for the command.
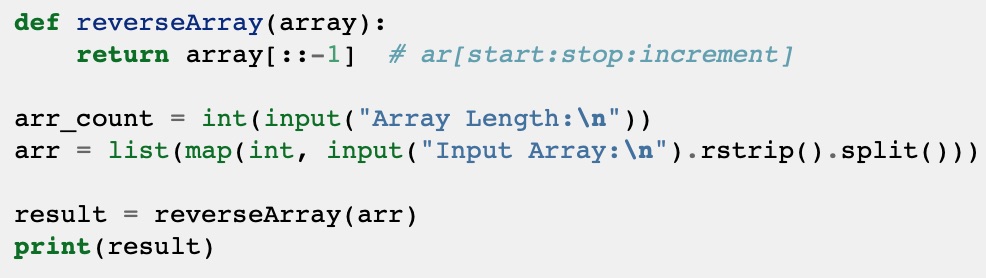 Grab another example array.py and try it yourself.
Automate with Services
Now that you have an initial idea of how Pygments works, let’s try to automate copy code format with a couple of clicks.
 Services provide convenient routines visibly on a right click. Screen captured on macOS Mojave 10.14
Essentially, Services are pre-defined routines that aim to automate tasks using AppleScript. Open Automator app via Spotlight using ⌘-Space Bar keystroke.
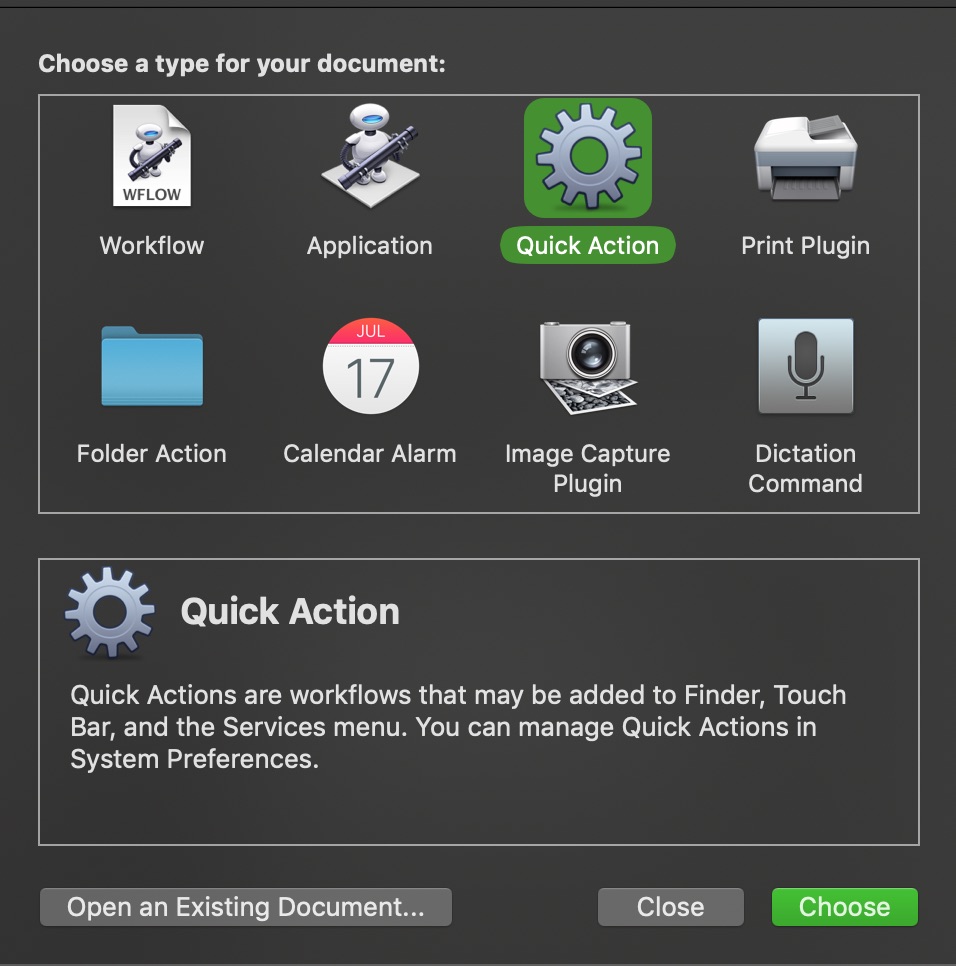 Step 1 – Select Quick Action workflow
Simply put, the flow is to Copy the selected text (Step 1) Prompt for highlighting language (Step 2) Set variable value (Step 3) Run command to
 Step 2 – Select Input as Text. On the left panel, search & drag
 Copy to Clipboard action
Note: The transition between Step 2 and 3. The Input(1) and Copy(2) actions are inter-connected (Above, middle), whereas the Copy(2) and Ask for Text (3) actions below are not connected.
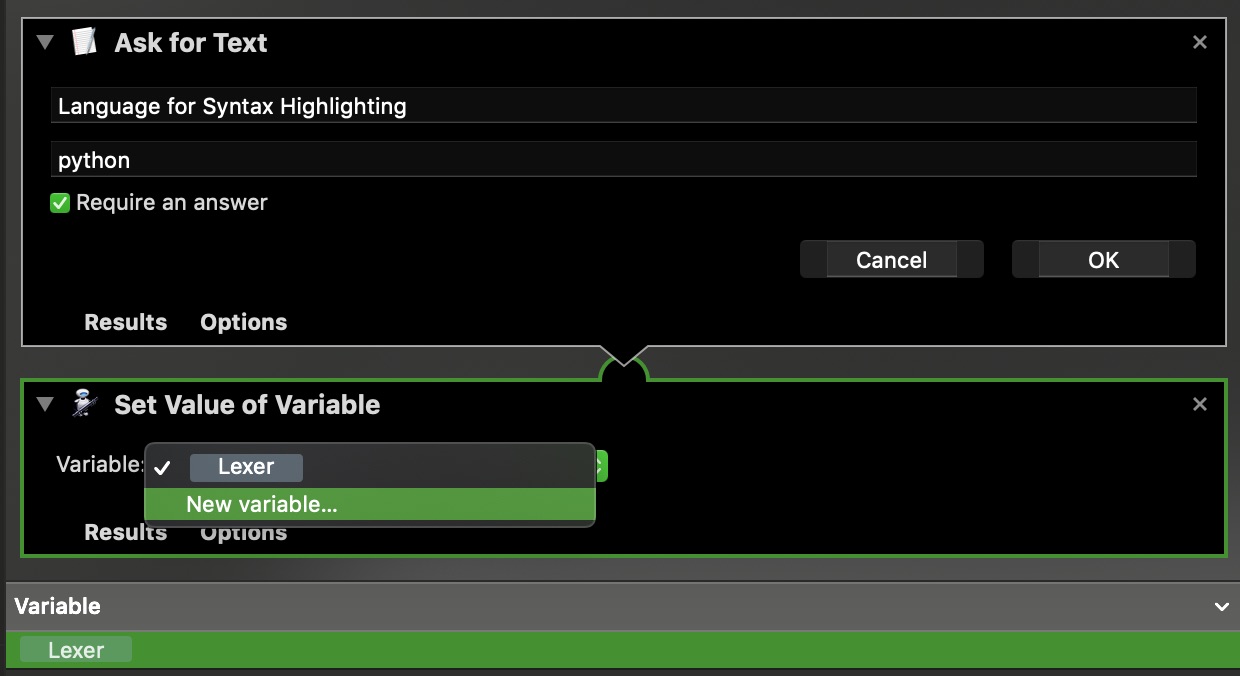 Step 3 – Similarly, search & drag
 Set Value of Variable action, then select New Variable. This will serve as input for the final command
Ultimately, the whole workflow should look similar to this.
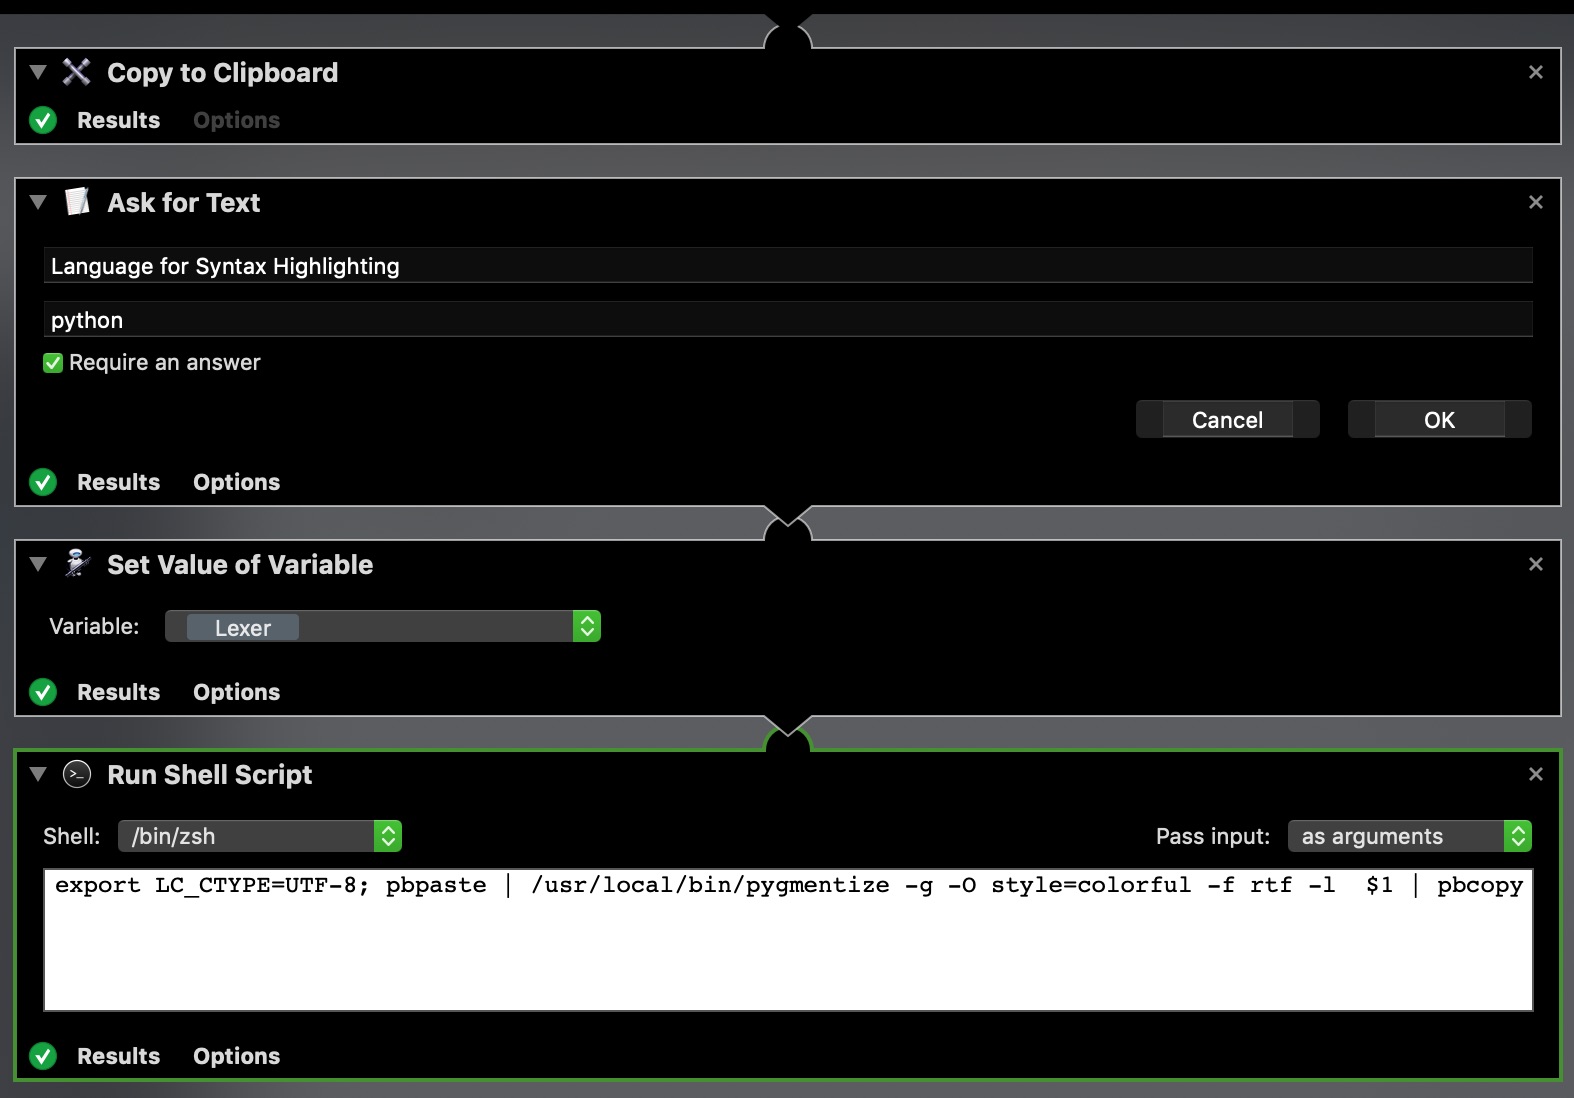 Step 4 – Finally, Add a
 Run Shell Script action, select your Shell and make sure it Pass input as arguments
pbpaste&pbcopy: Command lines to provide text from Clipboard and add text to Clipboard. This setup serves our purpose of copy code blocks and later able to paste a highlighted version of it.
New Pygments flags are added as well as the full path in order to ensure all cases.
-g: Automatically detect Lexer from the content, i.e. the programming language.-l: Manually input Lexer, i.e. the user-input in Step 3
Note: The -f formatter flag now utilizes rtf (Rich Text Format) instead.
1
2
export LC_CTYPE=UTF-8;
pbpaste | /usr/local/bin/pygmentize -g -O style=colorful -f rtf -l  $1 | pbcopy
The command here has been revised and is a little bit different than the ‘raw’ one from previous section. Most importantly, the export command ensures that the copied text is in UTF-8 encode in order for this to work.
Command Line variant
As a bonus, if you’re more comfortable working with CLI, there is a quick function for you. Usage is simply as passing any file into your CLI, for instance highlight array.py from the previous example.
1
2
echo -e 'function highlight() {/usr/local/bin/pygmentize -g -O style=colorful -f rtf $1 | pbcopy}' >> ~/.zshrc
source ~/.zshrc
Again replace the config file based on your Shell, the default is usually bashrc
⚠️ Important: Use of echo command with >> will append to file. Do not use >, this will replace all your text. I learned that the hard way !
The result will be copy onto your Clipboard and is ready to paste in any other application that support RTF.
Side note: With the -g flag enabled and file extension, there is no need to provide a Lexer as Pygments will automatically detect the language and highlight accordingly.
Explore highlight style
To find more about available color scheme, simply type python3 to access Python Environment or use Python3 IDLE if you use a Graphical UI application and the following code
1
2
3
from pygments.styles import get_all_styles
styles = list(get_all_styles())
print(styles)
All default themes have been composed below at your conveniences.
monokai
#!/usr/bin/python3

from engine import RunForrestRun

"""Test code for syntax highlighting!"""

class Foo:
    def __init__(self, var):
        self.var = var
        self.run()

    def run(self):
        RunForrestRun()  # run along!
manni
#!/usr/bin/python3

from engine import RunForrestRun

"""Test code for syntax highlighting!"""

class Foo:
    def __init__(self, var):
        self.var = var
        self.run()

    def run(self):
        RunForrestRun()  # run along!
rrt
#!/usr/bin/python3

from engine import RunForrestRun

"""Test code for syntax highlighting!"""

class Foo:
    def __init__(self, var):
        self.var = var
        self.run()

    def run(self):
        RunForrestRun()  # run along!
perldoc
#!/usr/bin/python3

from engine import RunForrestRun

"""Test code for syntax highlighting!"""

class Foo:
    def __init__(self, var):
        self.var = var
        self.run()

    def run(self):
        RunForrestRun()  # run along!
borland
#!/usr/bin/python3

from engine import RunForrestRun

"""Test code for syntax highlighting!"""

class Foo:
    def __init__(self, var):
        self.var = var
        self.run()

    def run(self):
        RunForrestRun()  # run along!
colorful
#!/usr/bin/python3

from engine import RunForrestRun

"""Test code for syntax highlighting!"""

class Foo:
    def __init__(self, var):
        self.var = var
        self.run()

    def run(self):
        RunForrestRun()  # run along!
default
#!/usr/bin/python3

from engine import RunForrestRun

"""Test code for syntax highlighting!"""

class Foo:
    def __init__(self, var):
        self.var = var
        self.run()

    def run(self):
        RunForrestRun()  # run along!
murphy
#!/usr/bin/python3

from engine import RunForrestRun

"""Test code for syntax highlighting!"""

class Foo:
    def __init__(self, var):
        self.var = var
        self.run()

    def run(self):
        RunForrestRun()  # run along!
vs
#!/usr/bin/python3

from engine import RunForrestRun

"""Test code for syntax highlighting!"""

class Foo:
    def __init__(self, var):
        self.var = var
        self.run()

    def run(self):
        RunForrestRun()  # run along!
trac
#!/usr/bin/python3

from engine import RunForrestRun

"""Test code for syntax highlighting!"""

class Foo:
    def __init__(self, var):
        self.var = var
        self.run()

    def run(self):
        RunForrestRun()  # run along!
tango
#!/usr/bin/python3

from engine import RunForrestRun

"""Test code for syntax highlighting!"""

class Foo:
    def __init__(self, var):
        self.var = var
        self.run()

    def run(self):
        RunForrestRun()  # run along!
fruity
#!/usr/bin/python3

from engine import RunForrestRun

"""Test code for syntax highlighting!"""

class Foo:
    def __init__(self, var):
        self.var = var
        self.run()

    def run(self):
        RunForrestRun()  # run along!
autumn
#!/usr/bin/python3

from engine import RunForrestRun

"""Test code for syntax highlighting!"""

class Foo:
    def __init__(self, var):
        self.var = var
        self.run()

    def run(self):
        RunForrestRun()  # run along!
bw
#!/usr/bin/python3

from engine import RunForrestRun

"""Test code for syntax highlighting!"""

class Foo:
    def __init__(self, var):
        self.var = var
        self.run()

    def run(self):
        RunForrestRun()  # run along!
emacs
#!/usr/bin/python3

from engine import RunForrestRun

"""Test code for syntax highlighting!"""

class Foo:
    def __init__(self, var):
        self.var = var
        self.run()

    def run(self):
        RunForrestRun()  # run along!
vim
#!/usr/bin/python3

from engine import RunForrestRun

"""Test code for syntax highlighting!"""

class Foo:
    def __init__(self, var):
        self.var = var
        self.run()

    def run(self):
        RunForrestRun()  # run along!
pastie
#!/usr/bin/python3

from engine import RunForrestRun

"""Test code for syntax highlighting!"""

class Foo:
    def __init__(self, var):
        self.var = var
        self.run()

    def run(self):
        RunForrestRun()  # run along!
friendly
#!/usr/bin/python3

from engine import RunForrestRun

"""Test code for syntax highlighting!"""

class Foo:
    def __init__(self, var):
        self.var = var
        self.run()

    def run(self):
        RunForrestRun()  # run along!
native
#!/usr/bin/python3

from engine import RunForrestRun

"""Test code for syntax highlighting!"""

class Foo:
    def __init__(self, var):
        self.var = var
        self.run()

    def run(self):
        RunForrestRun()  # run along!
Troubleshooting (Extra)
- Command not found with brew and/or python
Make sure that you have installed successfully, try source ~/.zshrc to refresh your Shell config file or simply open a new window.
- Command not found with Pygments
This is usually due to inproper installation of multiple Python version on your machine. Run
1
brew doctor && brew prune
to eliminate any empty keg and un-link unused dependencies.
Also, install Pygments with Python pip and NOT to be confuse with brew.
Disclaimer
This article offers knowledge and personal opinion based on the author’s point of view which perceived at the time of writing this article.
It is intended to serve “as-is” without any guarantee to work, proceed with caution. Your inputs and feedbacks are welcome as always.